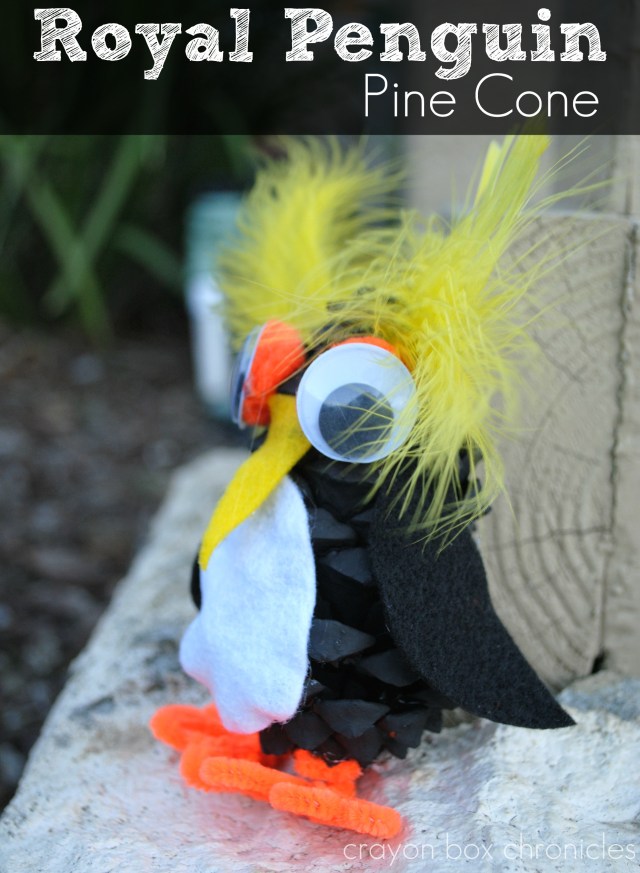

Meet Mr. Royal Penguin the pine cone. Pine cones are one my favorite nature finds to recycle. There are so many neat and interesting things you can create with them. After collecting a bunch yesterday, we’re ready to get creative! He is the first in our pine cone craft for kids series. This is a fun fall craft for a parent and child.
Fun Facts:
Royal penguins are one species of the crested penguin group (genus Eudyptes), so-named for their yellow crest on their heads. They have a white front, chin and face and are colored black on their back. They reach up to 70 cm (27.5 inches) in height and they weigh between 4 and 5.5 kgs (8.8 – 12 lbs). Royal Penguins can swim at speeds up to 30 km/hr (20 mph).

- Pine cones
- Black tempura paint or spray paint
- Paint brush
- Google eyes
- Yellow or white pom-pom balls
- Tacky glue or hot glue (parent)
- Black, white, & yellow felt
- Orange pipe cleaners
- Scissors


1. After gathering all your supplies, cover your work surface.

2. To make sure there are no critters are living inside your pine cones, (parent) bake them for 45 minutes at 250 degrees on a foil-lined baking sheet.
3. Once they’re completely cooled and sappy, you’re ready to get started.

4. Paint your pine cone black. Now there are several ways to do this ―dipping it in a bowl or can of black paint or spray painting. I had a lot of paint, but no can, so I improvised. I used a hurricane and poured the paint over it, while holding the pointed end and twisting in a circular motion. C loved pouring the paint while I turned the pine cone! Another option and slightly easier is spray paint. I wanted C to join in, so I chose paint.
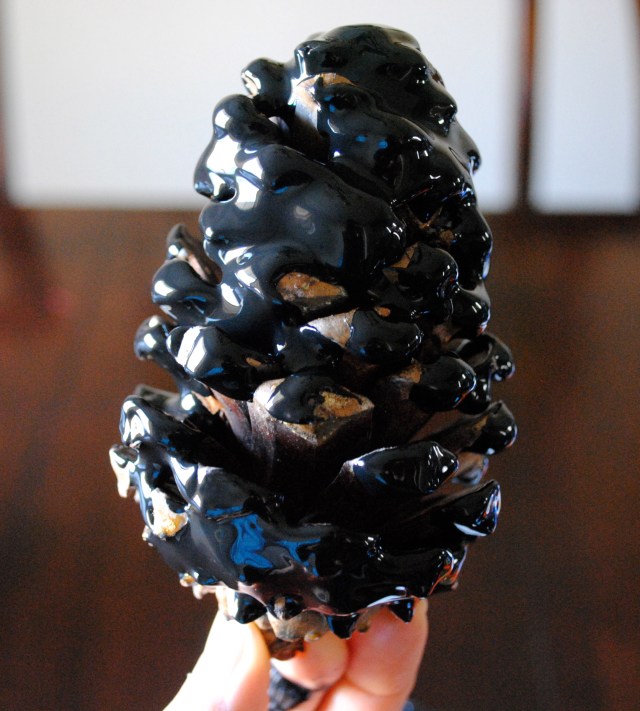
5. Tip: After pouring and twisting the top, I let it drip down, then flipped it over and did the same thing.
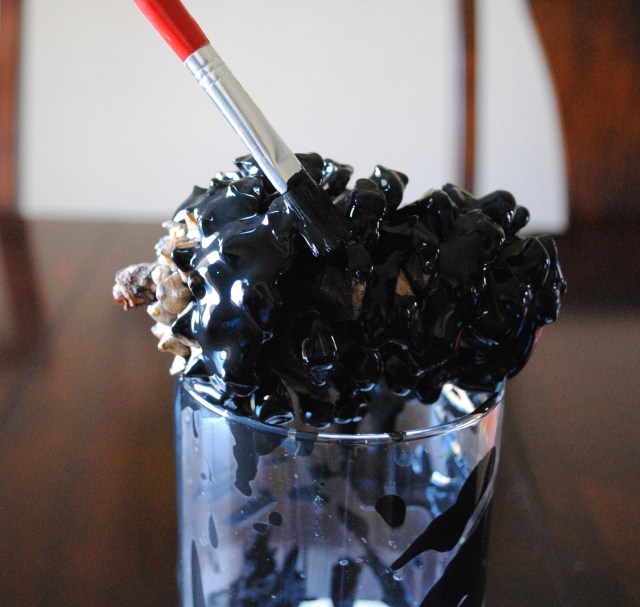
6. Next, I placed it sideways and used a paint brush to get deep into the cracks. C helped here too. If you’re able to just dip-it in a can both ways, it will cut-out all these steps. I put it outside in the sun to dry for a few hours.
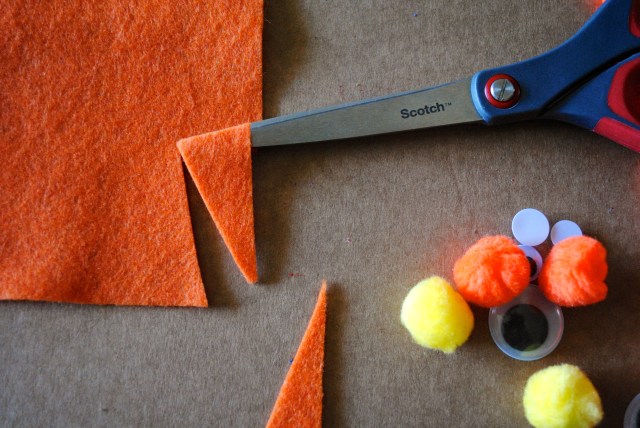
7. While its drying, cut your felt and prepare your penguin. Cut out your triangular nose. I started with orange, but used yellow in the end.

8. Next, cut out your penguins arms/wings ― I used a semi-oval shape.
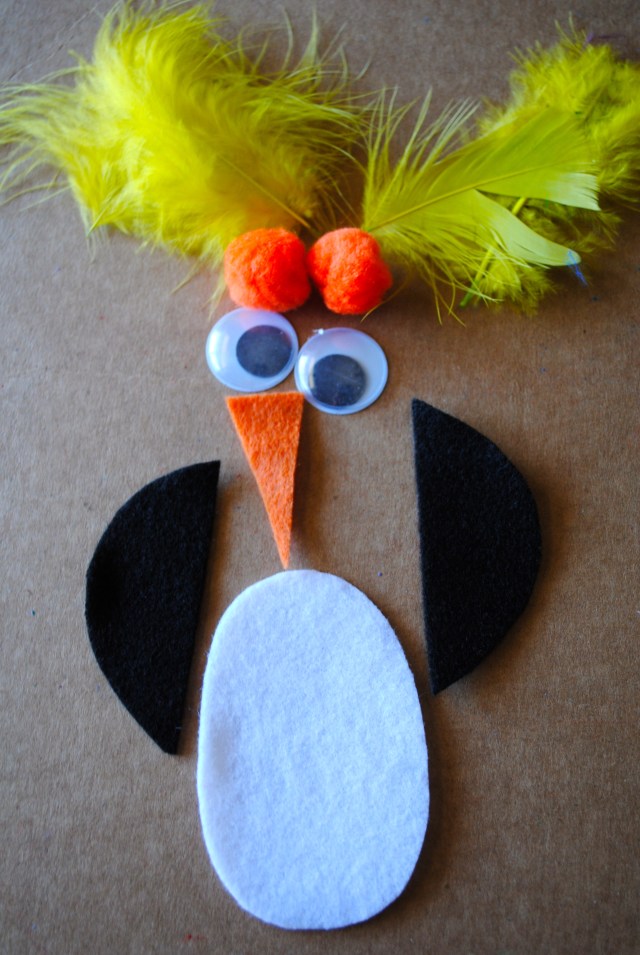
9. Then cut out your white belly and arrange them in order. Next, we will make the legs/feet.
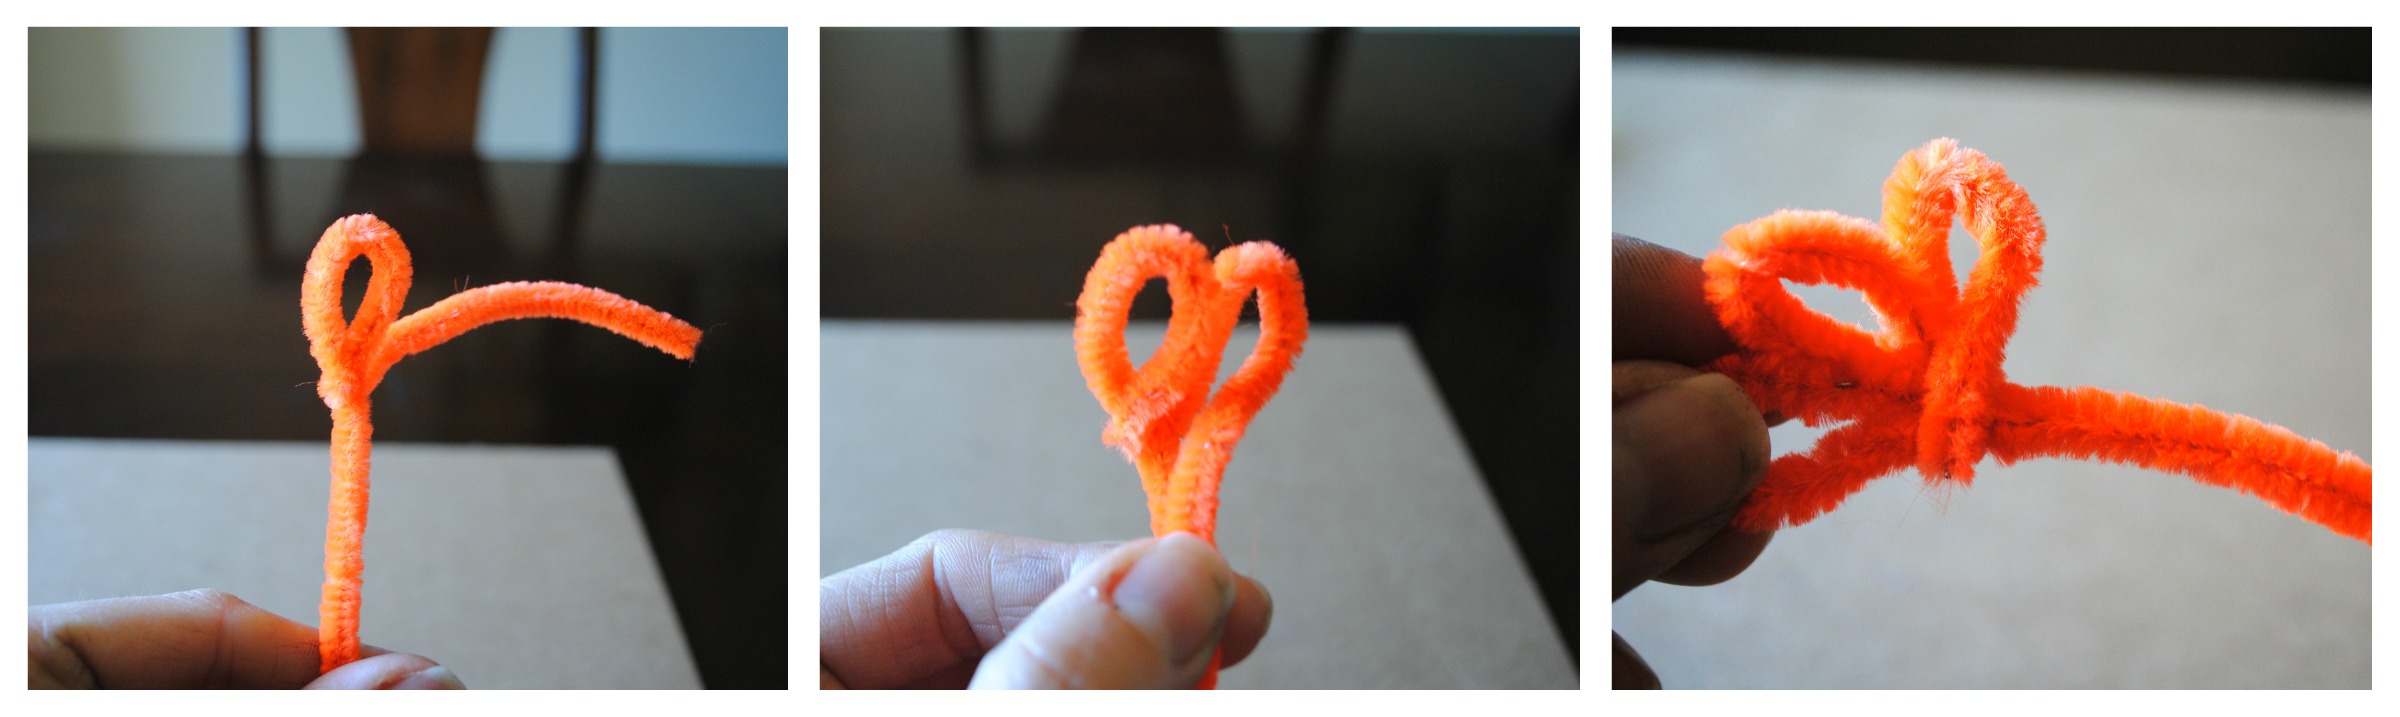
10. At the halfway point, loop one end around as shown above. Continue the same motion a total of three times. After the third loop bring the end around the base and twist it. This will close the loop to complete your leg/foot. Repeat again.

11. Now you have all your parts and you can begin to build your penguin. Start with glueing the eyes to the pom-pom. Next, glue the white belly on. Then glue on the beak, arms/wings, feet, and feathers.
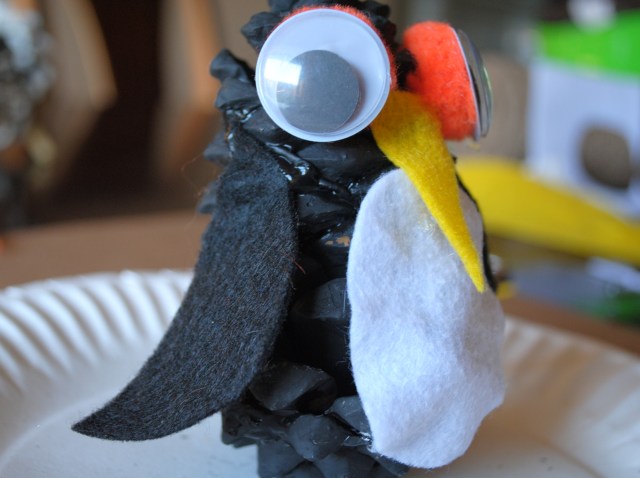

Meet Mr. Royal Penguin Pine Cone! He likes the grass too! 🙂


For more pine cone crafts, see PINE CONE SERIES.

If you’d like to see more, please consider Subscribing By Email.
Join us on Facebook, Pinterest, Twitter, and Bloglovin’ as we explore play!


What an adorable penguin craft! I know my kids would love this one, and we have pinecones galore out here right now! Thank you so much for linking up to Discover & Explore!
LikeLike
thank you so much Chelsey! I never realized pine cones continue to grow. Mr. penguin has put on a few pounds lol!
LikeLike
Cute craft and beautiful photography! This is on my list to remember when we do an arctic theme again this winter. Thanks for the great tutorial!
LikeLike
Hi Becky! Thank you so much! Yay, so fun! Please share photos when you do! 🙂 Cheers!
Heather
LikeLike