I’m so excited to be a part of the Ultimate Guide to 50 Craft Materials brought to you by Craftulate. She’s organized this wonderful series featuring 50 bloggers, each crafting with a different material. Our ultimate guide to yarn features DIY yarn pom pom sticks for painting, drumming, or just plain ol’ fun! Don’t forget to link up your yarn posts at the bottom of the page.
Are you following us on Facebook?


Yarn is a long continuous length of interlocked fibres full of crafting fun! It’s so versatile – you can cut, tie, lace, stitch, weave, and glue it! In the past, we’ve explored yarn activities that focused on fine motor development, tracing letters, and lacing. Today we’ll drum to the beat of pom poms sticks and paint!
Materials List:
- Yarn
- Scissors
- Sticks or Dowels
- Hot Glue
- Fork
- Paint
- Bowls
- Paper


Let’s begin with our DIY yarn pom pom tutorial. These fuzzy pom poms make fantastic homemade drumsticks for kids. You can also make pom pom garland, party hats, necklaces, and more. I’ve made pom poms with cardboard discs before, but using a fork to make pom poms is so much easier. The wider the fork, the longer the pom pom strings. We chose a standard size fork for mini, ‘short-haired’ pom poms. There’s a variety of great tutorials using different methods on Pinterest.
- Cut a 6″ pice of yarn and place it between the center fork prong. This serves as your tie.
- Wrap the string tightly around the fork, leaving a small 1-2″ piece hanging off the side. The more you wrap, the bigger the pom pom. Thick yarn, wrapped 40 times; thinner yarn, 60 times. Word of advice, thicker yarn is much more difficult to keep together.
- Once your finished wrapping, pull your tie together extremely tight! For thicker yarn, I tied an extra string once I removed it from the fork. For thinner yarn, it’s not necessary.
- Turn yarn ball on its side and cut through the ‘loops’ of the yarn. Be sure not to cut your tie or it will all fall apart. I suggest using sharp quality scissors.
- Now that you have one side cut, repeat on the other side.
- Once you’re finished cutting, fluff the pom pom.
- Carefully remove the pom pom from the fork. Trim if needed.
- Add a dab of hot glue and attach to your sticks. I tied the two loose strings to the stick several times for extra stability.

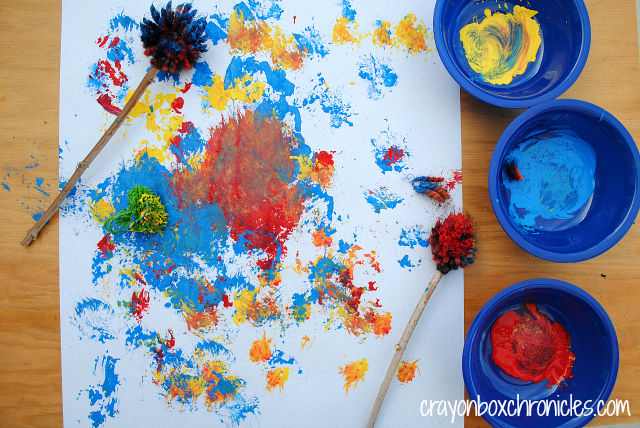
We made mini green pom poms as well with thinner string. It’s much easier and they stay together longer! I recommend using thinner string for the drumsticks. You can get a tighter tie with the fork method. I thought C would enjoy some hand pom pom dipping – great for sensory play too!

Once you make your sticks, it’s time for drumstick painting! Be sure to wear painting clothes, as this could get messy! We chose to drum on wood to reduce splatter. Next time we’ll paint on the homemade drum we made for super messy fun! Be sure to wear goggles if you’re using a drum!

C began by admiring the sticks! He was singing, dancing, and drumming to his own beat pre-paint!! We weren’t really interested in the end result, more the art process itself.
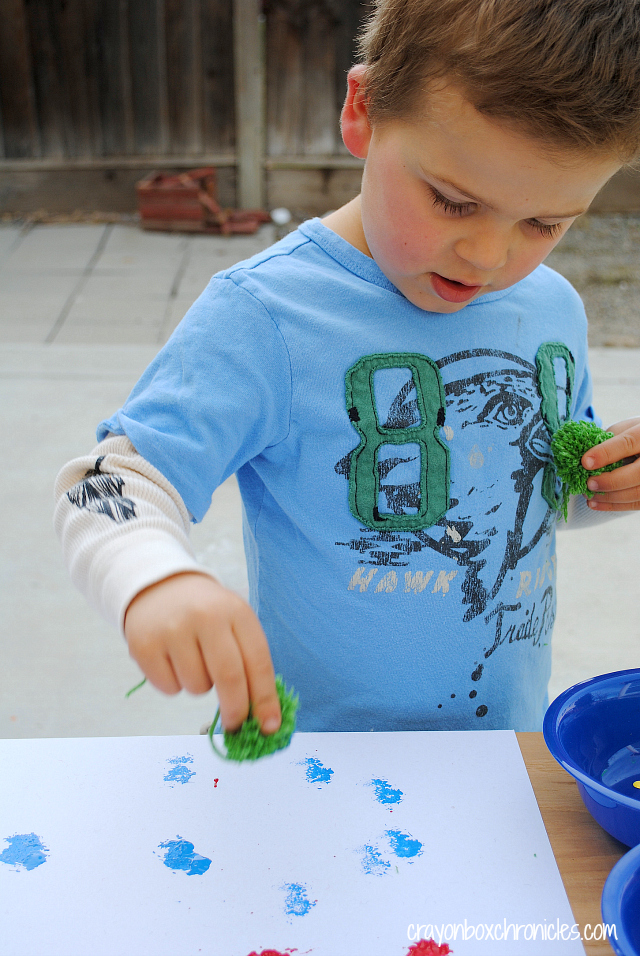
After lying down the paper, he started off pretty easy and slow with the mini pom poms. He kept signing, “Dp. dip, dooo-op, dip, dip, dooooo-op!”

Then the drumming fun began! He was having a ball dipping, drumming, and swinging his sticks everywhere!
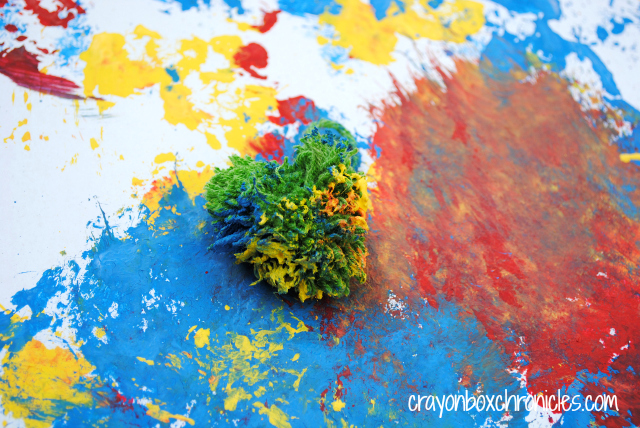
I love all the textures and colors from the pom pom balls and paint. C doesn’t always like to get his hands dirty, so I create these invitations to paint and explore materials to overcome his sensory challenges.

We’re always looking to find new and creative ways to paint and today’s was top on my list! Painting is one of C’s favorite activities (mine too!) Looking for more creative painting activities?

Tap, tap, tap tap!
So much fun and all with just a little yarn, sticks, and paint we had lying around the house! I just love easy to set-up crafts that use just a few basic materials!

“And I’m done, thank you!”

I hope you enjoyed our yarn activity today! To complete our ultimate guide to crafting with yarn, here’s other ways we’ve used yarn in crafts and activities:


We’d love for you to share your yarn related posts too! LINK UP below! Just click the cute blue monster!


For free updates on all our fun activities, please consider Subscribing by Email or RSS Feed. Connect with us on Facebook, Pinterest, Twitter, & Goggle+.


Love the idea of using the drum sticks to bang out a painting 🙂 Shared this and another of your ideas here http://siayla.blogspot.ca/2014/02/got-paint-try-painting-with-out-typical.html just so you know.
LikeLike
This is great! Will have to try it sometime! Thank you for sharing!
LikeLike
This is fantastic! I am going to try my hand at making these this week.
Thank you for stopping by the Thoughtful Spot Weekly Blog Hop this week. We hope to see you drop by our neck of the woods next week!
LikeLike
Fun! I’d definitely recommend the thinner sting for heavy drumming! Thanks so much!
LikeLike
So fun, Heather! We’ve never even made pom poms here! Thank you for sharing!!
LikeLike
Thanks Jackie! Ater a few failed attempts, I got the hang of it with the fork, lol! 🙂
LikeLike
They are so cute, what great idea.
LikeLike
Thanks! 🙂
LikeLike
Oh, that just looks like so much fun! Not only painting but drumstick painting? My daughter would love it!
LikeLike
thank you Emma! My son too! He went wild! 😉
LikeLike