
This post contains affiliate links for your convenience.
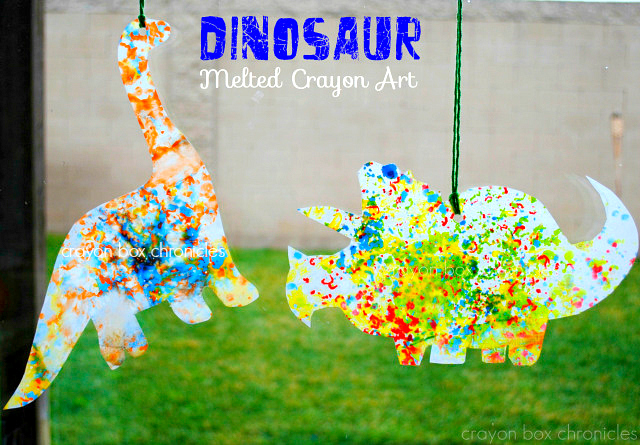
RAWR!! Does your child love dinosaurs? With C’s obsession with dinosaurs, I’m always trying to create new ways to explore dinosaur play and this was defiantly rip-roarin’ fun! I love crayons and he loves dino’s — it was a hit! Let’s dig into our crayon boxes and recycle all those crayon stubs, broken bits, or new crayons into melted crayon art — dino style! Triceratops and Brachiosaurus make a beautiful art piece, especially when the sunlight hits them!
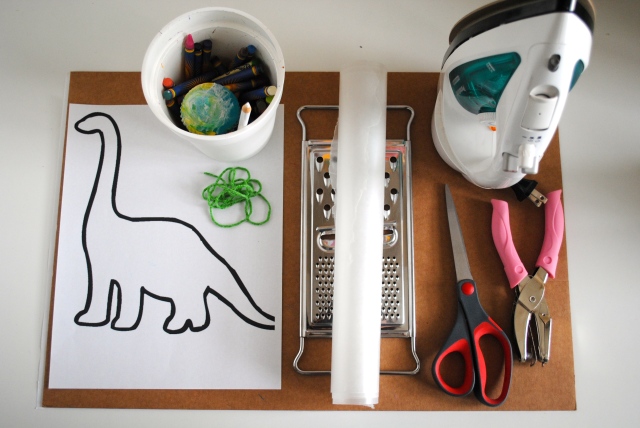
Materials Needed:
- Waxed paper
- Crayola Crayons
- Crayon sharpener, carrot peeler or grater (depending on your child’s ability level; parent supervision)
- Iron (parent!)
- Newspaper
- Yarn
- Fiskars Hole Punch (my favorite)

What’s Next:
- Cover your workspace completely! Cut a large piece of waxed paper, fold it in half, and lye it flat on your work surface.


2. Place your picture underneath both layers. I included both dinosaur templates at the bottom of the post for your use.


3. Trace your template. I used a white colored pencil, then remove the template picture.


4. While you’re tracing, have your child peel the crayon wrappers off. It’s a great exercise to boost fine-motor skills. For more fun fine-motor activities! Next, lift the top wax paper layer up and add your crayon shavings. I used a grater, but for a child a crayon sharpener works great or veggie peeler, if age appropriate.


5. When finished, fold the wax paper back over and seal fold the sides in — helps keep all the melted crayon inside the paper and eliminates a big gooey mess!


6. Next, cover your wax paper design with paper, newspaper, or a brown paper bag, but expect it to get ruined — oil stains from the crayons. Also, make sure the surface under is protected. I took an extra precaution by raising it off the desk using a box, then a brown bag. This isn’t necessary, but I want to keep the box. If you fold all sides of the wax paper in, it shouldn’t goop out. All you need to do is protect under and above, but the oil will stain the bottom layer and the top paper.
7. Set the iron on med-low, going back and forth a few times slowly. Keep lifting the paper to check it. Let it cool completely.


8. Once cooled, cut out your design. If you have a hard time seeing the image, slide the template back under and re-trace a little {see image below}.


9. Finally, hole-punch it, add yarn, and you’re done! Triceratops and Brachiosaurus melted crayon art — beautiful! You can display it in child’s window or around the house for everyone to enjoy!


Some things I learned the hard way:
- don’t move the iron in a windshield-wiper fashion, it really distorts the melted crayon.
- don’t use high heat, the wax paper will crack once it’s cooled.
- take your time going back and forth in a row; if you iron to long or to fast it will burn the crayon shaving — turned brown.
- make sure you fold in the sides of the wax paper or the shaving ooze out; this way your iron stays pretty and clean!
- try not to over-fill the design with a ton of shavings, less is more!


This was our first attempt — not so successful, but C had fun! For more dinosaur fun, check out Dinosaur Sponge Painting, Scented Dinosaur Play Clay, and Mini-Volcano Eruption.


Dinosaur Templates:


We love this craft! We would love to include this project as part of our upcoming post of our five favourite uses for old crayons at http://www.sustainmycrafthabit.com.
LikeLike
thank you so much!
LikeLike
This is so lovely! I posted something very similar to this way back in January and used it in the same way. I really feel that kids get the best out of this activity as they perform multiple muscle activities while creating a reusable decorative craft (which also helps to introduce them to concepts about light and refraction). Great ideas! http://littlefingersbigart.com/2013/01/11/crayon-shaving-stained-glass/
LikeLike
It certainly does take quite a little to locate great info like this. Thanks so much.
LikeLike
This is awesome – Heather, so many ideas!! I love that I can log into this page and get ao many great ideas of projects for M and me. Thank you so much!!!
LikeLike
Thanks Sandra! Can’t wait to see M’s creations!
LikeLike